May 3, 2014
time to relax...
With our bathroom renovation underway and nearing completion, it got me thinking about quick and easy DIY bath gifts. To me there's nothing more relaxing than a nice bubble bath to soothe and rejuvenate the soul.
Using my Curtsey Boutique supplies I put together a little package, all ready to add to a gift for the bath lover in my life. I just love kraft bags wrapped pretty. The little wooden scoop is just too cute not to include. I stamped on "relax" with some Versamark solvent ink, so that repeated use near water wouldn't wash it away.
I filled the bakers bag with lavendar bath salts, folded and secured it then topped it off with a heart shaped doily, bakers twine and a tag. Quick simple and ready to give away. You can find all of these great supplies at the Etsy store.
~Becks
Labels:
Curtsey Boutique,
DIY,
DT
April 20, 2014
Hoppy Easter!
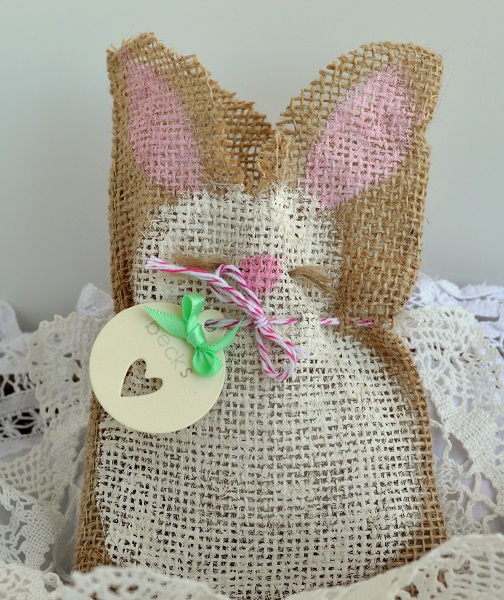
Hey all! Just hopping by to share a tutorial I did for Curtsey Boutique.
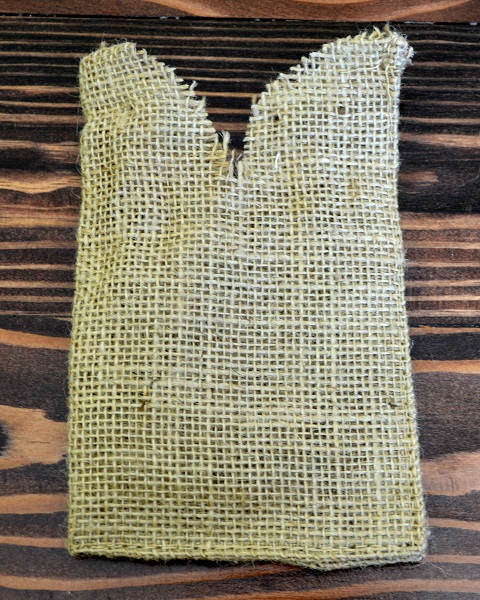
To create the bunny bag first start by taking out the hem and the twine at the top of the burlap bag and cut ear shapes out of the top.
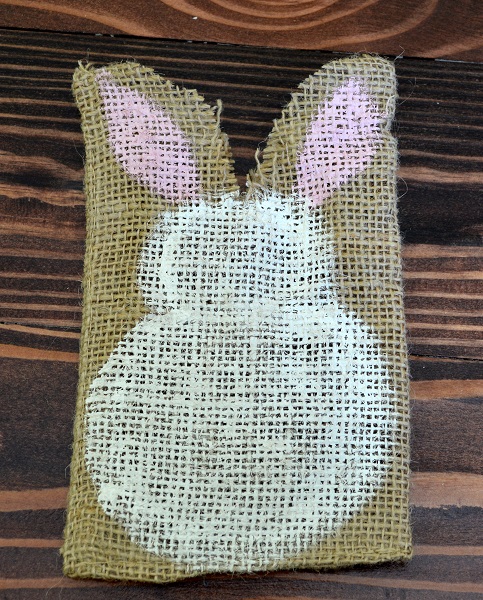
Using paint and a foam brush paint on two ears and then two circles to make the bunny body. Add a nose and eyes if desired. Using a piece of the twine removed in step one, thread through using a
large needle to create whiskers.
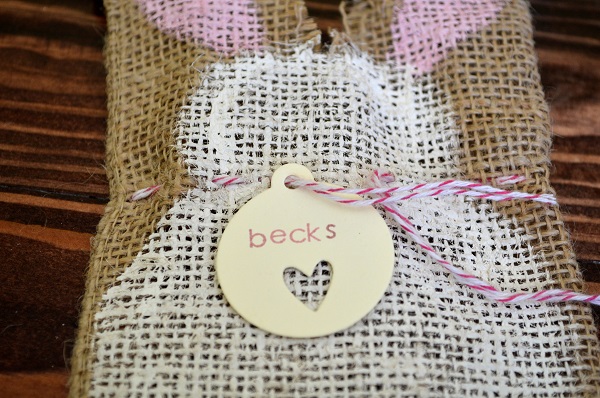
Using a double stand of bakers twine, feed around the bag using a needle to create a drawstring/ bow around the neck of the bunny.
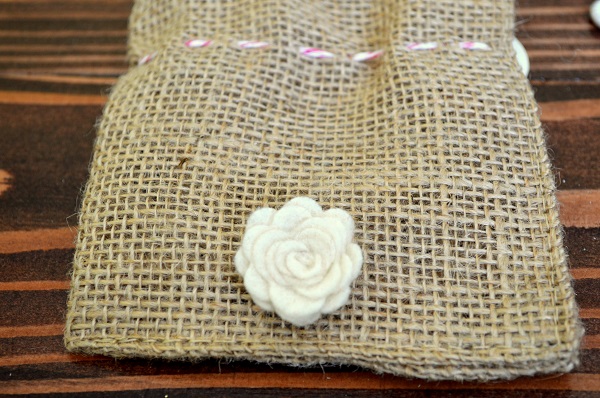
Add a tag with name and bow, and a white rolled felt flower to the back of the bag for the bunny tail.
Fill with candy and pull the drawstring close into a bow.
Create a whole herd of bunnies and give them away!
Happy Easter!!
~Becks
Happy Easter!!
~Becks
Curtsey Boutique Supplies:
Labels:
Curtsey Boutique,
DT,
Easter
March 27, 2014
christmas countdown...
Okay, so maybe it's too early. Or way late, but I thought I'd share one of my favourite DIY projects to date. I had seen this idea *here* and wanted to try it for quite some time now. And now I have, using simple everyday items, and some of my great Curtsey Boutique supplies. My take on this sweet advent calendar:
To begin with I painted an 18 inch embroidery hoop with some Antique White Web acrylic paint and let dry. Once dry I traced the inside circumference of the loop onto some sturdy thick cardboard. I cut it out and made sure it was a snug fit inside the hoop. I then cut a circle about 3 inches larger than the cardboard circle and pulled it taught over the cardboard, hot gluing the edges making sure the face of the fabric was stretched and free of wrinkles. Fit into the hoop and let the fun begin.
I knew I wanted to stick to a few pops of colour but mainly keep it neutral. I started with these great kraft envelopes with journal cards from Curtsey Boutique, along with small tags, small glassine bags, doilies, twine, burlap die cuts, snowflake die cuts and muslin bags. Other supplies included washi tape, bottle brush trees and wreaths, thumbtacks, burlap, felt, mini clothespins etc. Sky's the limit to decorating, so long as you have 24 little packets to countdown to Christmas!
Of course it's a personal choice to decorate how you like, but here I've jazzed up plain white tags with pretty washi and stamped names. Wrapped them in twine and adhered with mini clothespins.
Using confetti I made pretty little see through packets with small glassine bags and closed with washi.Using the same washi tape I adhered it to the mini clothes pin.
Using burlap I cut out a mitten and stocking, and made little pockets to stick instructions in.
And here it is all done. It would be easy to change out envelopes or packets each year to update. I can't wait to use it this year for Christmas.
~Becks
To begin with I painted an 18 inch embroidery hoop with some Antique White Web acrylic paint and let dry. Once dry I traced the inside circumference of the loop onto some sturdy thick cardboard. I cut it out and made sure it was a snug fit inside the hoop. I then cut a circle about 3 inches larger than the cardboard circle and pulled it taught over the cardboard, hot gluing the edges making sure the face of the fabric was stretched and free of wrinkles. Fit into the hoop and let the fun begin.
I knew I wanted to stick to a few pops of colour but mainly keep it neutral. I started with these great kraft envelopes with journal cards from Curtsey Boutique, along with small tags, small glassine bags, doilies, twine, burlap die cuts, snowflake die cuts and muslin bags. Other supplies included washi tape, bottle brush trees and wreaths, thumbtacks, burlap, felt, mini clothespins etc. Sky's the limit to decorating, so long as you have 24 little packets to countdown to Christmas!
Of course it's a personal choice to decorate how you like, but here I've jazzed up plain white tags with pretty washi and stamped names. Wrapped them in twine and adhered with mini clothespins.
Using confetti I made pretty little see through packets with small glassine bags and closed with washi.Using the same washi tape I adhered it to the mini clothes pin.
Using burlap I cut out a mitten and stocking, and made little pockets to stick instructions in.
And here it is all done. It would be easy to change out envelopes or packets each year to update. I can't wait to use it this year for Christmas.
~Becks
Labels:
Christmas,
Curtsey Boutique,
decor,
DIY,
DT,
handmade,
Pinterest projects
March 26, 2014
love, oh love...
What I'm loving around here lately:
Warmer temperatures and longer days... spring is around the corner, I can feel it...
Up-cycled(and mainly free)new workspace desktop for my craft room...
My BBC dramas and comedies, love curling up with them(mainstream t.v pales in comparison)...
Organizing and categorizing old and new craft supplies...
Nautical themes and pale colour schemes...
New family room reno almost completed...
Getting back into exercise regimens...
Playing hockey with the girls Wednesday nights...
Phone calls to back home and to old friends...
Birthday season (part one) beginning next month...
SO much to be thankful for and to love... inspiring my crafty projects lately, thought I'd share this one with you...
Thanks for the visit!
~Becks
Warmer temperatures and longer days... spring is around the corner, I can feel it...
Up-cycled(and mainly free)new workspace desktop for my craft room...
My BBC dramas and comedies, love curling up with them(mainstream t.v pales in comparison)...
Organizing and categorizing old and new craft supplies...
Nautical themes and pale colour schemes...
New family room reno almost completed...
Getting back into exercise regimens...
Playing hockey with the girls Wednesday nights...
Phone calls to back home and to old friends...
Birthday season (part one) beginning next month...
SO much to be thankful for and to love... inspiring my crafty projects lately, thought I'd share this one with you...
Thanks for the visit!
~Becks
Curtsey Boutique Items:
Labels:
Curtsey Boutique,
DT,
handmade,
love,
pocket projects
March 18, 2014
winter blues...
I can't wait for spring. This winter is taking its toll... extreme cold temperature for longer than usual periods of time. The bright sunshine is the only reprieve from the bitter cold. It streams through my windows and fills the rooms with warmth and light. Thankful for the sunbeams.
Thinking spring I made these using some of my Curtsey Boutique goodies for a co-worker of mine, using my paper scraps. I often don't have the heart to throw away even the smallest of pretty paper scraps. Two different versions, one with stitching and one using ric-rac. Pretty CB sequins add a pop of sparkle.
Some Basic Grey papers add an almost sky-like background. An added doily mimics the kite flying high in the clouds... Hope you like it:)
Before I go, a little song we used to sing on Good Friday, where our tradition was making paper kites and flying them all day long. Like stained glass windows in the sky...
Let's go fly a kite,
Up to the highest height!
Let's go fly a kite,
And send it soaring.
Up through the atmosphere,
Up where the air is clear
Oh, lets go fly a kite..
(From Mary Poppins)
Thanks for popping by!
~Becks
~Becks
Curtsey Boutique supplies:
Turquoise Sequins
Labels:
cards,
Curtsey Boutique,
DT
March 6, 2014
doing it for Duncan...

Just popping in to share a quick post... doing my small part to help out someone in need. For the month of March over at The Curtsey Boutique, CarrieAnne has a special limited edition gold flower. The sales of this flower will go towards helping out a family dealing with a terrible situation. One which no family should ever have to deal with. You can read CarrieAnne's original post HERE... and if you feel like supporting the cause, you can purchase the flower HERE.
Thanks for letting me share,
~Becks
March 2, 2014
celebrate today...
This year I decided to send out fun 'outside of the box' cards after the hustle and bustle of Christmas had died down. Usually each year my best intentions to get Christmas cards out fails, generally because I'm too busy making cards for other people.. I won't complain... no, never. I love seeing people's faces when they get their stacks of handmade cards made by me. Such a great feeling. So, instead of worrying about Christmas cards, my new tradition will be to send out greetings in the new year.
Here's a little tutorial I did on my 'cards' for this year for Curtsey Boutique:
On
your computer using Word or Photoshop, create a tall rectangular
greeting and print out. Trim bottom edge to make it look like a long
banner. Edge with glitter and adhere using a stapler. Add snowflake
embellies. Stamp a greeting along the bottom edge of the bag and heat
emboss.
*Technique tip* To get a perfect straight edge of glitter all around the banner, carefully adhere double side tape to all edges making sure there are no gaps. Peel off other side and cover liberally with glitter. Press the glitter into the tape before shaking off excess. Perfect, straight glitter lines every time!
Here's a little tutorial I did on my 'cards' for this year for Curtsey Boutique:
Measure and fold a medium sized glassine bag to fit inside a standard envelope. Wrap a 6 inch doily around the front of the bag and secure with tape. Fill glassine bag with various sizes, colours and textures of confetti. Add sequins. Sew top of bag at the fold with gold thread to keep confetti in.
*Technique tip* To get a perfect straight edge of glitter all around the banner, carefully adhere double side tape to all edges making sure there are no gaps. Peel off other side and cover liberally with glitter. Press the glitter into the tape before shaking off excess. Perfect, straight glitter lines every time!
Shake up the confetti and enjoy!
Curtsey Boutique Supplies:
Medium Glassine Bags
6 inch doily
Christmas Snowflake Die cuts
Other Supplies:
Gold Thread – Ravelry
Sequins-Craft supply
Confetti
Card stock + printer
Double side tape
Glitter
Labels:
Curtsey Boutique,
DT,
pocket projects
Subscribe to:
Posts (Atom)