I'm in Christmas card mode courtesy of a dear friends request for some... She selected the reindeer wreath ornament cards I had put up on the blog last year
here and again
here. Awhile ago one of my blog readers asked for a tutorial on these and I finally have gotten around to it.
Lets get started shall we?
Supplies:
*fabric scraps or fabric cut into strips.
*thin cardboard and card stock
*glue(Fast grab Tacky glue is my fave here)
*hot glue gun and glue
*ribbon
*buttons
* sheet music or old bookprint
*glimmer mist or glitter(optional)
*scissors
*pinking shears
Start by cutting out a circle of cardboard the size you want your ornament to be. Cut a smaller circle out of the middle. Mine are roughly 3 inches wide.
Cut fabric into strips..mine were about 1/4 inch wide by an inch and a half long. I used pinking shears to give the edges some character.
Starting the first layer:
This is my new best friend. Last year I used hot glue to glue all of the layers. It is effective but you have to be very sparing with the application of hot glue (in my opinion). This glue is awesome for keeping the layers where you want them to stick. And no burnt fingertips either is always a plus in my books. :)
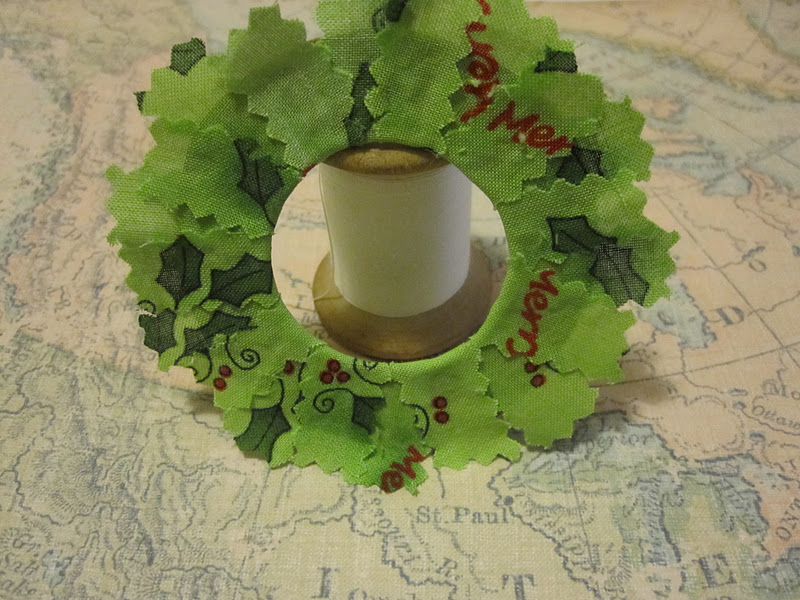
Glue strips onto the circle leaving a bit overhanging into the middle of the circle. Turn circle over and glue down the bits overhanging to make a smooth inside of the wreath.
Glue more strips in between to complete the first layer.
Add in another layer of strips on top of the first layer (let the first layer dry first..I did a bunch of ornaments at a time layer by layer) Allow for different lengths for each layer. I ended up doing 3 in total. Stagger the layers over the seams of the previous layer so you get a nice effect in the end.
Here's an example of each step in the process. You can see how it gets filled out as you add layers.(click on picture to enlarge)
For a little extra shine and to make it more festive I used my Glimmer mist in Antique gold..you could use really fine glitter and adhesive spray should you wish. Spray all over finished wreath before added embellies.
Once your wreaths are all glittered up, cut circles of sheet music(or old book print would look fab as well) slightly bigger than your inner circle. Glue to the back of the wreath over the fabric scraps that have been glued down layer by layer.
**tip: trim all the excess fabric bits off to make finished product look nicer. **
Cut ribbon to make a loop to hang your ornament by and using hot glue, attach to the back of the wreath before securing a card stock circle the size of the finished wreath to hide all the mess we've created.I secured mine with hot glue as I found it made for a better finished product. (As you can see I changed models in between steps..ignore this. lol)
Add a handmade bow and a button as well as some embellishments to the wreath. Mine are from a package of confetti my mom got for me years ago. Attach to a card with some re-positionable adhesive, add to a wrapped present..sky's the limit. I've also thought of adding a nice diecut circle to the back card stock, to add a handwritten message to the back of the ornament.
Voila! Simple as pie and easy to whip up a big batch.
I'll be back to show how I used these babies on the cards for my friend.
See you soon,
~Becks


Really pretty and a great tutorial ... have a wonderful weekend
ReplyDeleteFabulous, Rebecca. I can imagine a tree covered with these wreaths. Wouldn't that be beautiful? Thanks for sharing your talents ... and the glue tip - I have more hot glue burns than I care to remember!
ReplyDeleteOhhh great! The wreath tutorial just in time for Christmas! I love the idea of adding a handwritten message, a great gift idea.
ReplyDeleteAlso, AMAZING, delicate, artsy cards you've been posting lately. A lot of beautiful work.
Farrah