Showing posts with label Easter. Show all posts

April 20, 2014

Hoppy Easter!

Hey all! Just hopping by to share a tutorial I did for Curtsey Boutique.

189.JPG

To create the bunny bag first start by taking out the hem and the twine at the top of the burlap bag and cut ear shapes out of the top. 

163.JPG

Using paint and a foam brush paint on two ears and then two circles to make the bunny body. Add a nose and eyes if desired. Using a piece of the twine removed in step one, thread through using a 
large needle to create whiskers.

168.JPG

Using a double stand of bakers twine, feed around the bag using a needle to create a drawstring/ bow around the neck of the bunny.

174.JPG

Add a tag with name and bow, and a white rolled felt flower to the back of the bag for the bunny tail.

175.JPG

Fill with candy and pull the drawstring close into a bow.
Create a whole herd of bunnies and give them away!

Happy Easter!!
~Becks


Curtsey Boutique Supplies:

March 29, 2013

happy Easter!

Hi there Peeps!

Just popping in with a quick and simple Easter card that I made using Crafty Secrets "Spring Chicks" Digital stamps. This great egg stamp was so easy to play with, I simply used Photoshop to change the outline of the stamp from black to the colours I wanted.


It takes a little time, but all I did was make 3 copies of the original image, select the paint bucket and colour of my choice, then use the magnify to increase the size of the image so its easier to work with. Then I positioned my paint bucket over the lines and click on them to change the colour. (This is the easiest way I've found so far, but if you are a pro at PS then please pass on some tips. I'm still a newbie when it comes to PS so I don't know too many tricks)
I cut them out and added colour coordinated bows for a little dimension. I had to add a little sparkle, so I used some spray adhesive and yummy glitter on top.Topped off with some half pearls and it's a quick and simple card to tuck into an Easter basket.

I hope everyone has a wonderful Easter weekend. I'll be back on Monday with a brand new Crafty Secrets Linky party with some FAB new products. You won't want to miss this!!
~Becks

March 17, 2013

sweet springtime...

065

It is March, and I am dreaming of spring. The sunshine comes pouring through my big bay windows every morning, warming the house. I close my eyes and think of spring flowers, sprouts on the trees, the sweet cool breeze.. alas, there's still snow on the ground and the temperatures are still in the double minuses. *sigh* Such a tease, Mr Sun... I can't wait to be outside. Old Man Winter needs to take an early vacation.

067

I can't wait to start seedlings for the garden. I love planning what to grow each year, and tending to the garden throughout the summer. I still have to wait awhile to start my seeds, indoors of course, as we can't plant anything in the ground til after May 24th. The joys of living so far North. I wish we had a nursery to go and pick pretty potted flowers and herbs. I miss going to the nursery with my mama and sister to  pick out pretty flowers to make up our flower box and planters.

074

To keep my sunshiny, spring time mood, I got crafty with the new Crafty Secrets Digital Stamps for Easter. Have you seen them? Oh so cute and full of vintage goodness. I paired the new Spring Chicks with a great digital paper from CD . Seeds and sweet chicks, what's not to love? I made a simple seed packet out of vellum and added my daffodil seed pack front. The lined up chicks I coloured with water colours, distressed around the edges and added some fine glitter. The digi paper had the greatest garden theme and I used that in the background, fussy cut out the garden tools to add to my bows..

REBEKAH SPRINGTIME SEED PKT CARD

I hope Spring has sprung in your neck of the woods!
Happy Crafting:)
~Becks

March 8, 2013

Easter memories...

I loved Easter as a child. I fondly remember Easter weekends. Good Friday was always a huge deal where I grew up. Every year we would make our own tissue paper kites. It's amazing what a little string, wooden sticks and brightly coloured tissue paper can create. Once they were air bound, boy were they gorgeous; like stained glass windows floating in the sky. It was certainly my most favourite time of the year. I recall early morning Easter egg hunts and beautiful, overflowing Easter baskets awaiting us when we awoke.  Back then we thought it was from the Easter bunny, but we soon realized as we got a little older it was my mama who lovingly made up those gorgeous Easter baskets for us. Those beautiful baskets and wonderful memories were my inspiration behind my little egg shaped box baskets!

REBEKAH Easter Box Baskets Top Off(Victorian Egg Digi)

Today I'm using these fabulous Victorian Egg Digital images available from Crafty Secrets. I love their vintage look, it was hard choosing which pretty image to use on the top of my boxes. Begin with using an oval shaped box or make your own as I have done here. You can buy a great and easy template here. Once assembled choose your image and cut to size(or presize them before printing) and stick to the top of your box. It's perfectly ok if it doesn't fit  exactly right. We have a couple finishing touches up our sleeves :)

090

I added some glitter to a few spots on top of the flower images, just to give a little extra sparkle. To hide the edge of my printed image I ran a bead of hot glue around the edge, working about 2-3 inches at a time, and gently pushed a string of pretty pearls all the way around.

140

Next take a crepe paper trim and glue it to the outer edge of the lid. Or, make your own out of tissue paper as I have done here. All I did was cut inch wide strips of 2 colours of paper and glued them together, right down the middle. Then, taking pinking shears I just cut random slits in the paper(not all the way through) on both sides of the middle glue line to make its frilly and mimic the filler in the Easter baskets. Position it as high up on the sides of your lids and glue into place. If you place it too high up, don't worry-just give it a little hair cut to achieve the right height.
Just under your paper trim to hide the raw edge I added a piece of pretty crocheted trim right below and glued all the way around. Overlapping the trim and the edge of the paper trim I added a piece of polka dot ribbon to tidy it all up. I repeated the crocheted trim and ribbon around the edge of the bottom of my box to match the top, being sure to use the ribbon to hide the edge of the trim.

 090

Decorate the tops of your boxes how ever you choose. I went with eggs and feathers for the birdies, and flowers and ribbons for the other. I added a big bow to the very top of my box. The tags use sentiments from Crafty Secrets Postcard stamp.

136

To create a moveable handle, take a long strip of the same colour card stock and scallop the edges. Poke level holes on either side of the base of your box and through the ends of your long handle strip. Using a similar coloured brad, piece the strip and base together, closing the end of the brad snug, but not so snug so that the handle can't move. Fill with shredded tissue paper and goodies and you've got a sweet handmade gift to give away!

REBEKAH Easter Box Baskets-Victorian Eggs Digi

Don't forget over at Crafty Secrets Blog we are having our monthly linky party! Come and join us and win an awesome Crafty Secrets prize:) and everyone who enters will get a $6 coupon code:) Woo hoo!
~Becks

January 14, 2012

half revealed...

 "Words, like nature, half reveal and half conceal the soul within"-Alfred Tennyson.

 I am home again...Visiting my family. I am where my heart feels whole again and my soul can be quenched. Back to the quiet beauty of Vancouver Island, BC. I just love being here.
 Its where I catch up on laughter and stories, good food and good conversations.. cuddles from an old, sweet, tom cat. Makes me miss my fur babies a little less..
 Going to the market and the farm stands..getting organic goodies..such simple things you miss living elsewhere.
Two different cards using the same silhouetted image, altered slightly (from The Graphics fairy...) Two sweet Easter cards that fit the challenge, 'Back to Black', over at City Crafter Challenge Blog this week. How I love entering the challenges over there..proud to say that I was the winner over there for last weeks challenge. It's such a thrill and an honour!
I'll leave you with a quote which I find to be so fitting for my visit home:

"The soul is not where it lives, but where it loves"-Proverb.
Thanks for visiting!
~Becks

December 30, 2011

making the cut...

Once again the time has come to decide on what my 'one little word' will be for 2012. If you haven't heard of this before, it's the concept of finding(or letting one find you) one word to live by and keep close to you as you go through the upcoming year. Something to focus on in daily life. Something that speaks to you. Something to help enrich your life.

Over at CCCB this week the challenge is "make the cut",  and as I decided to play along this week it got me thinking about what words would make the cut for 2012. So many words have come to me over the last little while; less, more, grow, learn, do, live...

 
Hand cut banners out of scraps is pure love for me...
Great, meaningful words. For me they are all intertwined. I want to simplify in the new year. Less time and effort on the less important things in life; more time spent wisely; grow as a person, a sister, a daughter, a friend... Do more. No more saying 'one day' or "I'll get to whatever tomorrow." Live in the moment.

So, after some thought and mulling it over in my head my one little word for 2012 is: 'LEARN'
Fussy cut eggs decorated with half pearls remind me of batik eggs.
In so many aspects of my life this makes sense. This sums up what i want for 2012.  This is what I can apply to everyday:

Learn
...something everyday.
...to spend less time doing the things that I find clutter up my time.
(This goes hand in hand with 'more'. Which is why it made the list of OLW's. Spending more time doing what I love, or spending time with the ones I love.)
... to love more deeply. 
... to speak more kindly.
... to manage time wisely.
... to accept what I cannot change.
... to let go.
... to live simply.
... to enjoy the moment.

I welcome 2012 with open arms. I can't wait to see what it brings and where it takes me. I want to come back to this spot next year and see how I've grown. What I've learned.
Have a happy, healthy and prosperous New Year!
It's going to be magical...
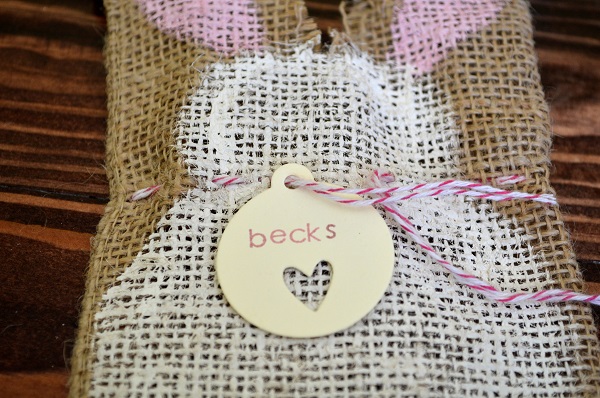
~Becks