Today I'm here to share with you a tutorial to create a gardening gift. I had seen a few tutorials online and decided to try my hand and share with you all today. This is for a seed packet gift package for someone to start a garden.
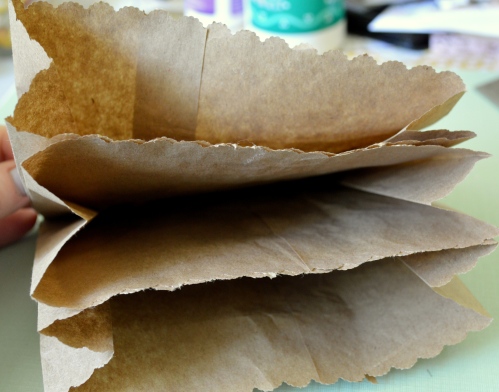
I started with 3 paper bags. I like to up-cycle so these have logo's on the backs from where I had gotten them. But don't worry. You won't see them once we are done. Put the logos facing inwards towards the centre bag. Both the front and back should be free of logos. Using hot glue I glued all of the bottoms of the bags together.
Next I took my bean packet and set it on the bag and measured so that I could trim the top of the bag so they don't stick out of the top.
Once I marked a line I cut slightly above it to account for my border punch. If you don't want to use a border punch, just leave it plain or use pinking shears. For either of the latter options you can cut right on the line.
Once you have your tops punched or cut, using hot glue again, join the back of the front bag to the middle bag and then do the same for the back bag. You will end up with 3 large pockets. Now we are ready to cover the front and back.
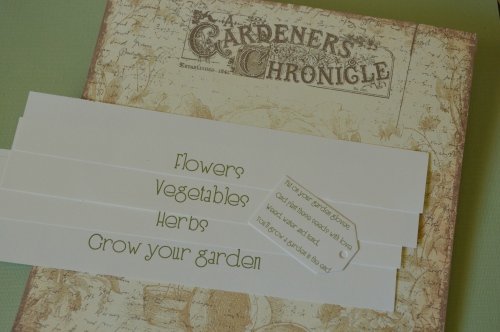
Here I'm using gardening papers from CD 2- Creating with Vintage Illustrations and the font included with the new Flower Garden digital set. Since I have 3 pockets I've divided up my seeds into 3 categories.
Printing 2 of the patterned papers,I used the brown paper bags and traced around them, then leaving about a quarter inch around each edge I cut it out and scored 1/4 inch on both sides. This will allow for us to join the front to the bag. I used a tape runner to add adhesive here.
The scored paper should fit just in the first fold of the side of the bag. Repeat the process for the back side and this is what it should look like.
Add the divider labels to the tops of the bags and add your seed packets.
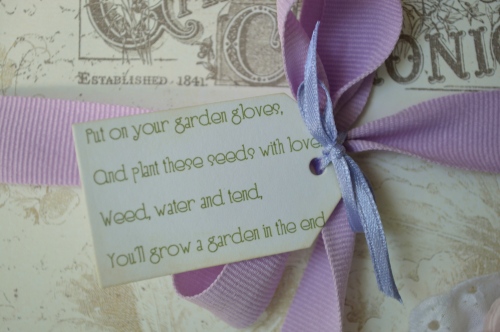
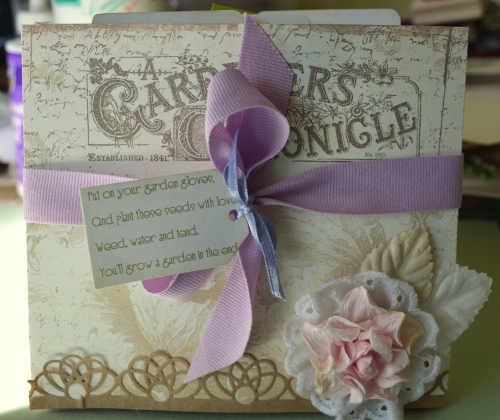
Embellish the front and add a large ribbon to tie the packet to keep it from opening up. I created a little rhyme to add to the front to explain what the gift is...
All tied up and ready to give to someone to help them start a garden. You could add a pair of cute garden gloves as well.
Be sure to see what the other DT members have created this month:
Vicki Chrisman (Team Leader)
Michele Kovack
Darlene Pavlick
Melissa Bove
Sheila Rumney
Be sure to get crafty and link up for the chance to win a gift certificate to use in the shop:)
Stay sweet!
~Becks


What a cute and clever gift idea Rebekah! I love the poem you added and how you used the font we included in green. It's really old but it looks so trendy.
ReplyDeleteThanks for sharing
Sandy
Great idea! Super Cute!
ReplyDeleteWhat a beautiful creation and such a lovely gift to give someone ... Thanks for the inspiration!
ReplyDeleteWhat a beautiful and thoughtful gift! Thanks for sharing such clear instructions.
ReplyDeleteI adore this project! What a great idea!
ReplyDeleteLovely garden gift bag. I really like how it is sectioned out.
ReplyDeleteWhat a neat idea! Love it!
ReplyDeleteSuper fun and sweet Rebekah! Love this!!
ReplyDeletehugs...
What a sweet gift idea, love the little labels too! ~Diane
ReplyDeleteWOW Rebekah ... what a clever and cute project! Thanks for sharing such a fun idea ... awesome tutorial!
ReplyDeleteHUGS from OHIO!
I love this design. Thank you for sharing.
ReplyDeleteSo sweet! :)
ReplyDelete